June 2018 - Arewa Tricks

Hot

Post Top Ad

Your Ad Spot

Saturday, June 30, 2018

Dalilin da ya sa na kaurace wa gangamin APC – Kwankwaso

June 30, 2018 0

Tsohon gwamnan jihar Kano Rabiu Musa Kwankw
aso ya bayyana cewa ba haka kawai bane ya kaur
acewa taron gangamin zaben APC da aka yi a
Abuja tun ranar Asabar.

Kwankwaso ya ce gudun a samu tashin hankali ne
ya sa shi da jama’ar sa suka ki halartar taron.

” Na farko dai uwar jam’iyyar da ta wuce bata ami
nce da zababbun wakilai na bangaren mu ba.

A d
lilin haka muka ga tunda ba a amince da na mu
wakilan ba, idan muka zo za a iya samun baraka
a wajen taron
” Kowa ya ga abinda ya faru a rumfunar Jihohin I
mo da Delta inda aka yi ta kai ruwa na tsakanin w
akilan bangarori biyu.

Akayi kacakaca da kujerun
rumfunar sannanwasu ma suka sami rauni.

” Da mun zo da kila abin yafi nasu muni, shine yas
a kawai muka ce a hakura a kaurace wa taron.

Kwankwaso ya kara da cewa yana yi wa sabbin z
babbun shugabannin jam’iyyar fatan alkhairi da fa
an Allah yasa su iya hada kan jam’iyyar.

Idan ba a manta ba da yawa cikin ‘yan kungiyar s
abuwar PDP basu halarci wurin gangamin ba sai d
ai kuma an kammala taro lafiya sannan tsohon g
wamnan jihar Edo, Adams Oshiomhole ne aka zab
a sabon shugaban jam’iyyar APC din.

Read More

2019: Sule Lamido ya jaddada cewar Buhari ya gaza ba zai iya mulkin ba, a wata ziyara da ya kaiwa Wadata

June 30, 2018 0

- A yayin jawabinsa lokacin ziyarar ne
tsohon gwamnan yayi jirwaye mai kama da
wanka ga shugaban kasa Muhammadu
Buhari
Bayan Kwanaki 2 da ziyarar da tsohon
mataimakin shugaban kasa kuma mai
neman Jamiyyar PDP ta tsayar da shi
takarar shugabancin kasar nan wato
Alh. Atiku Abubakar.

Sai ga shi tsohon gwamnan Jihar Jigawa
wanda shi ma ya ke zawarcin kujerar
shugabancin kasar a dai tutar Jamiyyar
ta PDP ya kaiwa masu ruwa da tsaki
akan shugabancin Jamiyyar, inda ya
bayyana musu sha'awarsa ta neman
tsayawa takarar shugabancin kasar nan
a tutar Jamiyyar a zaben 2019.

2019: Sule Lamido ya jaddada cewar Buhari ya
gaza ba zai iya mulkin ba, a wata ziyara da ya
kaiwa Wadata
Sule Lamido wanda ya bayyana tare da
rakiyar Tsohuwar ministar harkokin
kasashen waje, Josephine Anenih da
wasu manyan ‘yan Jamiyyar PDP da
wasu masu take masa baya.

A jawabinsa yayin ziyarar Sule Lamido
ya bayyanawa shugabancin Jamiyyar
cewa shi jigo ne a siyasar kasar nan
wanda zai iya kai kasar nan tudun Mun
tsira, matukar ya kai ga nasarar zama
shugaban kasa.

Sannan kuma ya bukaci shugabancin
Jamiyyar da ya yi duk mai yiwuwa
wajen hada kai don ganin sun kai
dukkanin wani dantakarar jamiyyar
APC zata tsayar kasa a zaben 2019 da
ya ke tafe.

Da yake bayyana irin salon gwamanatin
shugaban kasa Muhammadu Buhari
kuwa, kira yayi ga ‘yan kasar nan da su
sani cewa dama tun asali shugaban kasa
Buhari yana da tarihi yin mulki cikin
rikice rikice, wanda wannan ne ya sa
yanzu ma rikici ke cigaba da faruwa a
sassan kasar nan.

Sannan ya shaida cewar babban
Burinsa shi ne dawowa da kasar nan
martabarta domin ‘yan kasar nan su
amfana da arzikin da Allah yayi mata.

Kana yayi kira ga dukkan wani mai
fatan ganin hakan da ya taho su hada
karfi waje guda domin kaiwa ga gaci.
A nasa bangaren kuwa shugaban
Jamiyyar PDP na kasa Prince Uche
Secondus, bayyana Sule Lamidon yayi a
matsayin jajirtaccen dan kishin kasa
wanda ya dauki halin 'yan mazan jiya
irinsu Sir Ahmadu Bello,

Chief Obafemi
Awolowo da Dr. Nnamdi Azikiwe.
Latsa wannan domin samun sabuwar
manhajar labarai ta NAIJ.com Hausa a
wayar ku ta hannu:

Daga. Hausa.naij.ng

Read More

An Gaji Da Ganin Manyan Jarumai Irinsu Jamila Nagudu, Hadiza Gabon, Aisha Tsamiya A Fina- Finan Hausa – Inji Aminu Bono

June 30, 2018 0

Fitaccen mai bada umarni a fina finan Hausa na
Kannywood, Aminu S Bono ya bayyana
damuwarsa da yadda ake yawan fito da manyan
jarumai mata a kusan kowanni Fim, inda ya
bayyana hakan a matsayin wata babbar kalubale.
Daraktan ya koka kan karancin sabbin jarumai
Mata, inda yace hakan ne ya sanya tsofaffin
jarumai irinsu, Jamila Nagudu, Fati Washa, Aisha
Tsamiya, Hadiza Gabon da sauransu yin kane
kane a masana’antar Kannywood.
Bono ya cigaba da cewa kamata ya yi a ce
tsofaffin jaruman sun koma fitowa a matsayin
iyaye saboda girma ya fara kamasu, amma
saboda karancin sabbin jini ya sa duk an bi an
raja’a akansu, sai dai yace sun fara kulla
kulalliyar yadda zasu yi musu juyin mulki da
sabbin taurari.
“A yanzu mun fara fito da sabbin jarumai Mata,
da suka hada da Zee Preety, Amal Umar, Bilkisu
Shema, Zulaihat Ibrahim, Maryam Yahaya da
sauransu, ta hanyar fito dasu a bidiyon wakoki da
ba na fim ba. Inji su
Da yake amsa tambayar ko rashin ganinsu
Jamila Nagudu a Fim zai kawo nakasu ga
amsuwar Fim, sai yace “Su ma kafin su zo, su
Fati Muhammad ne ke haskawa, kuma zuwan
nasu ya kawo musu cigaba”.
Ya cigaba da cewa yanzu an wuce lokacin da
mata masu zaman kansu ke shigowa Fim, don
kuwa a yanzu a cikin Mata goma da zasu yi
rajistan fara Fim, za’a iya samun bakwai daga
cikinsu masu digiri ne ko kuma suna cikin
karatun digirin.

Read More

Karanta Amsar Da Rahama Sadau Ta Ba Wani Daya Tambayeta Cewa Yaji Ance Ta Koma Kirista?

June 30, 2018 0

A kwanakin baya anyi rade-radin cewa,

tauraruwar fina-finan Hausa da turanci, Rahama
Sadau wai ta koma Kirista dalilin korar da aka
mata daga masana'antar fim din Hausa da kuma
zuwa kasar Amurka da tayi,

tuni dai wancan
labari ya wuce dan kuwa jarumar ta karyatashi
tun a wancan lokacin.

Wani bawan Allah ya yiwa Rahama Tambaya
Ashafinta Na Twitter Cewa,

Naji Jita-Jitar Cewa Wai Kin
Zama Kirista Amma Ban
Yarda Baa, Shin Gaskiyane
Ko Kuwa Ba GasKia Bane?.

Jarumar Rahama Sai Ta Maida Masa da Amsar
Cewa,

Naji Cewa Yanzu Wai Kai Ba
Mutum Bane, Shin Gaskiya
Ne?
D aga Jin Wannan Amsar Nata Tambayar Tashi
Ya Bata Haushi Harta Harsala Kamar Haka ...

Idan Baku Manta Ba KwanaKin Bayama Haka
Makamancin Haka Ya FaruKan Jarumai Kamar
Su

Read More

Friday, June 29, 2018

MTN Welcome Back Bonus, Get 2000% WinBack Offer From Mtn, Recharge N100 And Get N2000

June 29, 2018 0

Hello guys, did you know you can now get huge
rewards from MTN Nigeria simply by re-
activating your unsued mtn simcards.

MTN WinBack is also known as Welcome Back
offer. It is an offer that rewards dormant
customers for re-activating their lines. I.e.

customers that have spent 45 – 180 days on
the network without performing any chargeable
activity will be rewarded with a 2000% bonus on
their first recharge in a month for 3 months.

It is as simple as it sounds. So, have you
dropped your MTN sim card for this period of
days? Quickly clean up the dust and insert in
your device to enjoy this promo. All MTN
customers that have not made use of their SIM
for a period of 3 months or 45 days will be
rewarded with a whooping N2000 when you
recharge just
N100 .

How it works
Re-activate your inactive MTN SIM, recharge a
minimum of N100 and enjoy 2000% bonus on
your first recharge for the period of three (3)
months.

2000% (20X) bonus on recharge of
N100 and above with maximum recharge of
N1000.

MTN Welcome Back Recharge Bonuses
√ Recharge of N100 gives N2,000
√ Recharge of N200 gives N4,000
√ Recharge of N400 gives N6,000
√ Recharge of N500 gives N10,000
√ Recharge of N1,000 gives N20,000
How Is The Bonus Used?

* MTN won't touch the actual money you
recharge (eg. N100).

* 500% of the instant bonus will be used for
voice calls and SMS to all networks in Nigeria
1500% will be used as data.
* In a nutshell, the bonus can be used for SMS,
voice and Pay-as-you-go data bonus.
How Your Calls and Data is Charged
National calls default tariff plan rate is 80kb/
sec (N48/min), National SMS at the default
tariff plan rate is N4/SMS capped at 75 SMS
weekly and data at the default tariff plan rate is
N5/MB.
Simply dial *559*65# to check your bonus
balance.

Note: Credit bonus cannot be used to purchase
data bundles. You will be able to enjoy the offer
for a period of 3 months, but you can only get
the bonus just once per month.

Read More

Thursday, June 28, 2018

Bana Jin Tsoron Ka Kore Ni A Kannywood - Inji Umma Shehu

June 28, 2018 0

Jaruma fina-finan hausa na dandalin
Kannywood, Umma Shehu, ta shirya saka
wando daya da mai yi mata bita da kulli a
masana'antar fim.

Duk da cewa bata bayyana suna wanda take
mayar ma raddi, jarumar ta bayyana cewa
baza ta damu ba idan har aka kore ta daga
Kannywood.

A sakon da ta wallafa a shafin ta na kafar
sada zumunta, tauraruwar fim ta bata boye
irin rashin mutunci da zata iya yi ga wanda
ke neman fushin ta.

Tana mai cewa " Na fika rashin mutunci
kuma ni da kake kallo bana tsoron kowa sai
Allah ".

Ga cikakken sakon da ta fitar kamar haka;
"Babu abunda yadameni dakai idan kaga
dama kasa a koreni a kannywood dan nasan
bakaine me bada daukaka ba allah ne dan
haka wallahi nafika rashin mutunci nida kake
kallona bana tsoran kowa sai allah ni ummah
Shehu nafi karfin nabaka hakuri batare da
namaka laifiba dan kasa anyi dcasting dina
saime kamanta da allah shine meyi kafin
kaima kanka ai ammaka dan haka bacire ni
yakamata ayiba korana yakamata kayi
nonsense nibazansa hoto ina fadanci ba don
babu abunda nake nema agun kowa sai gun
Allah kaje katambayi waye ummah shehu
za’agayamaka irin rashin mutuncin dazanyi
kuma idan katashi tambaya kazo unguwarmu
katambaya anan ne zakaji ainihin halin
ummah babu wanda ya isah naime fadanci
idan ina sonka Ina sonka idan bana sonka
bana sonka ni haka nake dan haka to hell
with you ".

Lamarin dai ya jawo cece-kuce tsakanin
masoyan ta masu bibiyan shafinta. Wasu sun
bada ra'ayi na tayi hakuri kar ta dauki
mataki.

Haka kuma wasu na ganin dai-dai ne idan ta
nuna ma wanda ke neman ta da mummunar
harka halin ta na rashin mutunci domin
kauce ma faruwar haka nan gaba
Daga: Pulse Nigeria

Read More

Cikakken Sakon Tsohuwar Jaruma Fim Ummi Zeezee Zuwa Ga Yan Nigeria

June 28, 2018 0

Ga Sakon Tsohuwar Jarumar Fim Ummi
Zeezee Zuwa Ga Yan Nigeria Ta Rubuta
Wannan Sakon A Shafin Instagram Dinta
""Salam dear nigerians ,wasu suna amfani da
sunana a face book sunamin karya iri iri da
kuma bata suna a gareni Wanda ina kyautata
zaton masoyan APC ne.

hakan ya samo
asaline domin sunsan bana shiri da boss
dinsu Mr president.last week sun hada
hotona Dana wani gardin banza a daji wai
yana lalata dani sukaga hoton baiyi tasiri ba
domin Allah ba azzalumin bawansa bane
baya kuma kama bawa da laifin da bai aikata
ba.to da suka ga hotona da suka hada da
gardi Wanda kuke cewa timaya ne baiyi
tasiri ba sai kuma suka dawo suka ce wai ni
yar shi'A ce,shima suka ga baiyi tasiri ba da
suka dangan tani da shi'A.sai kuma yau
suka sake cewa wai na fita daga shi'A har
na dawo ina addu'a Allah ya dauwa Mar da
"sir zazzaky " a gidan yari .to karya ake min
ni Sam banyi maganah akan sir zazzaky
cewar Allah ya dauwa Mar dashi a gidan yari
ba domin ni ina tsananin girmama sir
zazzaky saboda sunansa daya Dana
mahaifina kuma ni aduniya duk mai sunan
mahaifina to ina daraji shi saboda duk mai
sunan kallon uba nake masa a sakamakon
kaunar da nakewa babana sosai.dan haka
karya akemin .

Kuma ku masu son batamin suna ina son ku
sani cewa annabi Muhammad s.a.w.yace :in
duniya zata taru bata ISA ta daurawa bawa
abunda Allah bai dauramasa ba na masifa ko
alkairi haka kuma yace in da duniya zata taru
bata ISA ta daukewa bawa abunda Allah ya
daurawa bawansa na masifa ko alkairi.

dan
haka na dogara ga Allah kuma zai kare ni a
bisa sharrin da kukemin iri iri akan
buhari.sannan naji kunce na tuba wai na
dena adawa da buhari ko ?to shima karya
kukemin.ni yanzu ma na fara adawa dashi
indai akan siyasa ne ,nagode.
daga ummi ibrahim(zeezee)""

Read More

Best ways to scan documents using phone

June 28, 2018 0

Anna Okon

To be sure, a dedicated scanner is still great to have if you frequently need to scan a large handful of documents. But using your phone also works great if you only have a couple of documents to scan every now and then. The following tips from howtogeek.com should come in handy.

How it works  

If you’re using an Android device, the best way to scan documents is through the Google Drive app, which comes pre-installed on most Android devices.

You can scan documents directly into Google Drive by tapping the “+” button in the lower right corner of the home screen.

When the menu slides up from the bottom, select “Scan”.

It may ask for permission to access the phone’s camera. If so, tap on “Allow”.

When you are ready to scan your document, fill up the screen with the document as much as you can and tap the blue capture button. You can also shed a little light on the document by tapping the flash icon next to the capture button if your device has a flash. If your device doesn’t have a flash, this option won’t appear.

After you scan the document, a preview of it will immediately appear. Don’t worry if it looks like most of the document is cut off. This is where the crop tool comes into play. Tap on it to make cropping adjustments.

Tap, hold, and drag on the dots to change the area that is scanned and uploaded — you likely only need to mess with the corner dots for this.

Once finished, tap on the checkmark in the lower right corner of the screen.

After scanning…

You have three options immediately after scanning something:

Tap the plus icon to add more pages to the document.To redo a scan, tap the circular arrow in the middle.Tap the checkmark icon to finish and upload the document to Google Drive.

You can also make minor adjustments to your scans as you go. For instance, tapping on the painter’s palette in the top right corner will allow you to change the scan’s colour selection and cater it towards a specific kind of document. By default, the scanner will automatically pick the one it thinks is best.

Lastly, the three dots in the upper right corner will let you delete, rename, and rotate the scan if need be.

Uploaded scans are added to Google Drive as PDFs and the names are prepended with the word “Scanned”, followed by the date and time. You can move, rename, or delete any of your scanned documents by clicking the three dots next to the file’s name.

You can also share your scanned documents from this menu by tapping on “Share Link”. This will share a link to the document on Google Drive, while “Send a copy” will allow you to share the actual file over email, send it to Dropbox, and more.

Or, if you move to a desktop computer, you can even convert that scanned PDF into a document that you can then edit or export to Microsoft Word.

Copyright PUNCH.
All rights reserved. This material, and other digital content on this website, may not be reproduced, published, broadcast, rewritten or redistributed in whole or in part without prior express written permission from PUNCH.

Read More

How to Download Videos from YouTube Using Opera Mini Web Browser (Mobile)

June 28, 2018 0

Opera Mini is a Web Browser which has gone too much popular these days. But while downloading videos from YouTube it shows can't download. Well let's see the trick to download the videos.

Method One of Two:
By Changing the URLEdit

Go to the YouTube website. Here is thelink.

Locate the YouTube search bar and type the name of the video you want to download.

Select the desired video you want to download from the search result list.Note that not to click on watch video.

Go to the address bar of the browser where you type the URL. You will see the address bar starting with (m.)

Remove the (m.) and type (ss) (without dot).

Click OK. You will notice that a new page will open where you can download your video.

Select your desired format and then click on the download button.

Opera Mini will ask now for a path to download your file. Select the download path and download the video!

Method Two of Two:
By JavascriptEdit

Open Opera Mini Browser.

Select bookmarks(#5) in your opera mini. Note that #5 is a shortcut of opera mini 6 and higher versions.

Add bookmark to the site and name itYouTube download.

Replace the URL with a javascript. You can find it on blogspot

Save the bookmark of it.

Select the desired video on YouTube you were going to download.

Scroll down and select desktop view or classic view.

Go to your browser settings and look forsingle column view. Turn it on.

Reload the webpage.

Select the Saved Bookmark.

You will find a download box appearing below. Click on download button save your path and the file is downloaded!

You can follow the first method (by changing the URL directly) to download YouTube videos to the PC.

Read More

Why You Need to Format Your Android Phone

June 28, 2018 0

This post will be guiding you on Why You Need to Format Your Android Phone. Sometimes our Android Devices got faulty and this makes us to finally visit a repair engineer for repair. 

In the process, you might be told that it’s necessary for them to format your gadget. Although your don’t need to format sometimes, you are only being told do they could earn their cash from you.

Even if you need to format your Android Phone, it’s a simple thing you can do by yourself without paying to anyone. 

Why You Need to Format Your Android Phone

There are a lot of reasons to format your Android phone but we will be discussing few of them in the post.When you need to sell your device or gift your phone to someone.In the case of return your device back to the Maker for service(necessary to keep your personal data safe).When you are no longer in control of the system due to excessive lag and overheating.In the process of wiping out before virus from your device.

Note: Before formatting device, consider backing up the files and data so as not to lose everything in the process.

Now that you’ve known Why You Need to Format Your Android Phone, kindly share the post with your friends too.

Read More

Tecno F1 Specs and Price

June 28, 2018 0

Remember the Tecno launch event held in Lagos recently? This is one of the smartphone unveiled at the event alongside its other sibling in the F-series, the Tecno F2. The Tecno F1 is absolutely a budget smartphone and as such does not offer much features. Hence, the smartphone is aggressively priced and suitable for users that want a second smartphone or on a very tight budget.

Tecno F1 Key Specs and Features

5.0-inch, IPS LCD capacitive touchscreen, 854 X 480 pixelsQuad-Core MediaTek MT6580A CPU with 512MB RAM8GB built-in storage, up to 16GB with a memory card5MP rear camera and a 2MP front camera2, 000mAh removable Li-ion battery3G connectivity

Design and Display

When it comes to low budget smartphones like the Tecno F1, a nice design isn’t top priority. Nonetheless, the Tecno F1 to an extent is a good looking device with 18:9 aspect ratio alongside a nice plastic build – a common occurrence in low budget smartphones. The front houses three capacitive touch buttons below the screen and array of speaker, sensors plus camera at the top.

Talking about the viewing screen, there is an average low budget offering in place. So don’t be too judgemental about it because this is what you’d find in a similar budget smartphone. That being said, there is a 5.0-inch FWVGA (854 X 480 pixels) display with a nice 18:9 aspect ratio seen in premium smartphones.

Battery and Camera

Inside, there is a meagre 2, 000mAh battery which is about all you need for a day usage on the smartphone. This is possible considering the low specs on the smartphone which in turn consumes less power. Also, if you are looking for a quick charge you would have to pay more for a mid-range to premium smartphone instead.

Taking pictures is not a feature to be enjoyed on this smartphone rather it was a feature born out of necessity. In this regard, the Tecno F1 comes with a 5MP rear camera with flash and a 2MP front camera.

Hardware and Software

In the area of hardware, the smartphone doesn’t have much with nothing more than an entry level SoC in charge of operations. You’ve got a MediaTek MT6580A running at 1.3GHz an a Mali-400 GPU for graphics munching.

In addition, there’s a 512MB RAM with 8GB of internal storage. Expansion of the storage us supported up to 32GB using a MicroSD card. Despite being an entry level smartphone, you have the latest Android 8.0 Oreo Go Edition optimized for a smooth predominance with Go version of pre-installed apps.

Pricing and Availability

The smartphone is available in various smartphone retail outlets and online stores for about 24, 000 naira depending on the deal and your location.

Tecno F1 Specs

Here are a few specs of the Tecno F1:

General Features

Platform: Android 8.0 Oreo (Go Edition)Processor: Quad-core MediaTek MT6580AGPU: Mali-400 MP2Memory: 512MBColours: Black, Gold, Blue and RedDimension: 145 x 74.2 x 9.7 mmWeight: –SIM Type: Micro simSIM Count: Dual sim

Display

Display: 5.0-inch, IPS LCD capacitive touchscreen, 854 X 480 pixelsScreen Protection: –

Camera

Rear Camera: 5MP camera, 720p[email protected]Rear Camera Features: -LED dual-tone, Geo-tagging, touch focus, face/smile detection, HDR, PanoramaFront Camera: 2MP camera, 480p[email protected]

Storage

Built-in Storage: YesMemory Card Support: Yes, up to 32GBBundled Cloud Storage: –

Network Support

2G GSM: Yes2G CDMA 1X: –3G WCDMA: Yes3G CDMA EVDO: –4G LTE: –

Internet & Connectivity

GPRS: YesEDGE: Yes3G/WCDMA/HSPA: YesHSPA+: YesCDMA EVDO: –4G LTE: –WLAN: Wi-Fi 802.11 a/b/g/nWi-Fi Hotspot: YesBluetooth: Yes, v4.0 with A2DPNFC: –Infrared Blaster: –USB Port: MicroUSB 2.0

Messaging

SMS/MMS: YesInstant Messaging: YesPush Emails: YesEmail Protocol: –

Entertainment

Music Player: MP3/WAV/eAAC+/FLAC playerVideo Player: MP4/H.265 playerFM Radio: YesLoudspeaker: Yes3.5mm Jack: Yes

Navigation

Navigation: Yes, with A-GPS, GPSMaps: Yes

Sensors & Control

Digital Compass: –Accelerometer: YesProximity Sensor: YesLight Sensor: –Barometer: –SpO2: –Pedometer: –Heart Rate Monitor: –Gyroscope: –Fingerprint Scanner: –Iris Scanner: –Face Unlock: –Intelligent Digital Assistant: –Motion Sensing / Gesture Control: –Voice Control: –

Other Features

Video Streaming: YesActive Noise Cancellation: YesWireless Charging: –Built-in Mobile Payment: –Water Resistant: –Dust Resistant: –Image Editor: YesVideo Editor: YesDocument Viewer: YesDocument Editor: Yes

Battery

Battery: 2, 400mAh removable Li-ion batteryTalktime: –Standby Time: –Fast Charging: –

Read More

How to Hack Wi-Fi Passwords

June 28, 2018 0

Your intensions when cracking a Wi-Fi password are no doubt noble—we trust you—so here's how to do it.

Chances are you have a Wi-Fi network at home, or live close to one (or more) that tantalizingly pops up in a list whenever you boot up the laptop.

The problem is, if there's a lock next to the network name (AKA the SSID, or service set identifier), that indicates security is activated. Without the password or passphrase, you're not going to get access to that network, or the sweet, sweet internet that goes with it.

Perhaps you forgot the password on your own network, or don't have neighbors willing to share the Wi-Fi goodness. You could just go to a café, buy a latte, and use the "free" Wi-Fi there. Download an app for your phone like WiFi-Map (available for iOS and Android), and you'll have a list of over 2 million hotspots with free Wi-Fi for the taking (including some passwords for locked Wi-Fi connections, if they're shared by any of the app's 7 million users).

However, there are other ways to get back on the wireless. Some require such extreme patience and waiting that the café idea is going to look pretty good. Read on if you can't wait.

Windows Commands to Get the Key

This trick works to recover a Wi-Fi network password (aka network security key) only if you've previously attached to the Wi-Fi in question using that very password. In other words, it only works if you've forgotten a previously used password.

It works because Windows 8 and 10 create a profile of every Wi-Fi network to which you attach. If you tell Windows to forget the network, then it also forgets the password, so this won't work. But most people never explicitly do that.

It requires that you go into a Windows Command Prompt with administrative privileges. To do so, use Cortana to search for "cmd" and the menu will show Command Prompt; right-click that entry and select "Run as administrator." That'll open the black box full of white text with the prompt inside—it's the line with a > at the end, probably something likeC:\WINDOWS\system32\>. A blinking cursor will indicate where you type. Start with this:

netsh wlan show profile

The results will bring up a section called User Profiles—those are all the Wi-Fi networks (aka WLANs, or wireless local area networks) you've accessed and saved. Pick the one you want to get the password for, highlight it, and copy it. At the prompt below, type the following, but replace the Xs with the network name you copied; you only need the quotation marks if the network name has spaces in it.

netsh wlan show profile name="XXXXXXXX" key=clear

In the new data that comes up, look under Security Settings for the line "Key Content." The word displayed is the Wi-Fi password/key you are missing.

On macOS, open up the Spotlight search (Cmd+Space) and type terminal to get the Mac equivalent of a command prompt. Type the following, replacing the Xs with the network name.

security find-generic-password -wa XXXXX

Reset the Router

Before you do a full router reset just to get on the wireless, try to log into the routerfirst. From there, you can easily reset your Wi-Fi password/key if you've forgotten it.

That's not possible if you don't know the password for the router, either. (They're not the same thing unless you set it up that way). Resetting the router only works if you have access. That access could be over Wi-Fi (which we've just established you don't have) or physically utilizing an Ethernet cable.

Or that access can simply be that you are in the same room as the router. Almost every router in existence has a recessed reset button. Push it with a pen or unfolded paperclip, hold it for about 10 seconds, and the router will reset to the factory settings.

If you've got a router that came from your internet service provider (ISP), check the stickers on the unit before a reset—the ISP might have printed the router and Wi-Fi key right on the hardware.

Once a router is reset, you need another password (plus a username) to access the router itself. Again, you can do this via a PC attached to the router via Ethernet—you'll need that since the reset probably killed any potential Wi-Fi connection you had going in. The actual access is typically done with a web browser.

The URL to type is either 192.168.1.1 or 192.168.0.1, or some variation. Try them randomly; that generally works. To figure out which one, on the PC connected to the router, open a command prompt and type "ipconfig" without the quotes. Look among the gobbledygook for an "IPv4 Address," which will start with 192.168. The other two spaces, called octets, are going to be different numbers between 0 and 255. Note the third octet (probably a 1 or 0). The fourth is specific to the PC you're using to log into the router.

In the browser, type 192.168.x.1, replacing the X with the number you found in the ipconfig search. The 1 in the last octet should point at the router—it's the number one device on the network.

At this point, the router should then ask for a username and password. You can check your manual, but you probably lost it or threw it away. So instead, go toRouterPasswords.com, which exists for one reason: to tell people the default username/password on every router ever created.

You'll need the router's model number, but that's easy enough to find on the back or bottom. You'll quickly see a pattern among router makers of having the username ofadmin and a password of password. Since most people are lazy and don't change an assigned password, you could try those options before hitting the reset button. (But c'mon, you're better than that—change the password when you access the router's settings via your web browser.)

Once you've accessed the router interface, go to the Wi-Fi settings, turn on the wireless networks, and assign strong but easy-to-recall passwords. After all, you don't want to share with neighbors without your permission.

Make that Wi-Fi password easy to type on a mobile device, too. Nothing is more frustrating than trying to get a smartphone on Wi-Fi with some cryptic, impossible to key-in-via-thumbs nonsense, even if it is the most secure.

Crack the Code

You didn't come here because the headline said "reset the router," though. You want to know how to crack the password on a Wi-Fi network.

Searching on "wi-fi password hack," or other variations, nets you a lot of links—mostly for software on sites where the adware and bots and scams are pouring like snake oil. Download them at your own risk, for Windows PCs especially. It's best to have a PC that you can afford to get effed up a bit if you go that route. I had multiple attempts with tools I found just get outright deleted by my antivirus before I could even try to run the EXE installation file.

You could create a system just for this kind of thing, maybe dual-boot into a separate operating system that can do what's called "penetration testing"—a form of offensive approach security, where you examine a network for any and all possible paths of a breach. Kali Linux is a Linux distribution built for just that purpose. You can run Kali Linux off a CD or USB key without even installing it to your PC's hard drive. It's free and comes with all the tools you'd need to crack a network. It even now comes as an app for Windows 10 in the Windows App Store! If you're only after a Wi-Fi network, the Wifislax distro is a Live CD targets them directly.


kalilinux

If you don't want to install a whole OS, then try the tried-and-true tools of Wi-Fi hackers.

Aircrack has been around for years, going back to when Wi-Fi security was only based on WEP (Wired Equivalent Privacy). WEP was weak even back in the day and was supplanted in 2004 by WPA (Wi-Fi Protected Access).

Aircrack-ng—labeled as a "set of tools for auditing wireless networks," so it should be part of any network admin's toolkit—will take on cracking WEP and WPA-PSK keys. It comes with full documentation, but it's not simple. To crack a network you need to have the right kind of Wi-Fi adapter in your computer, one that supports packet injection. You need to be comfortable with the command line and have a lot of patience. Your Wi-Fi adapter and Aircrack have to gather a lot of data to get anywhere close to decrypting the passkey on the network you're targeting. It could take a while. Here's a how-to on doing it using Aircrack installed on Kali Linux. Another option on the PC using the command line isAirgeddon.

If you prefer a graphical user interface (GUI), there is KisMAC for macOS. It's mainly known as a "sniffer" for seeking out Wi-Fi networks. It's the kind of thing we don't need much of these days since our phones and tablets do a pretty good job of showing us every Wi-Fi signal in the air around us. But, it can crack some keys with the right adapter installed. Also on the Mac:Wi-Fi Crack. To use those, or Aircrack-ng on the Mac, you need to install them usingMacPorts, a tool for installing command-line products on the Mac.

Cracking the much stronger WPA/WPA2 passwords and passphrases is the real trick.

Reaver-wps is the one tool that appears to be up to the task. You'll need that command-line comfort again to work with it. After two to 10 hours of brute force attacks, Reaver should be able to reveal a password... but it's only going to work if the router you're going after has both a strong signal and WPS (Wi-Fi Protected Setup) turned on. WPS is the feature where you can push a button on the router, another button on a Wi-Fi device, and they find each other and link auto-magically, with a fully encrypted connection. It's also the "hole" through which Reaver crawls.

(Even if you turn off WPS, sometimes it's not completely off, but turning it off is your only recourse if you're worried about hacks on your own router via Reaver. Or, get a router that doesn't support WPS.)

Hacking Wi-Fi over WPS is also possible with some tools on Android, which only work if the Android device has been rooted. Check out Wifi WPS WPA TesterReaver for Android, or Kali Linux Nethunter as options.

Watch: 1 Cool Thing: Nighthawk LTE Mobile Hotspot Router (AT&T)

Read More

6 Useful Android Settings You Might Not Know About

June 28, 2018 0

If you’ve been an Android user for several years, you might think you know the Android settings menu inside out. After all, there’s no way you’d have accidentally overlooked a useful option, right?

Unfortunately, you probably have overlooked something. These days, the Android settings menu is a sprawling maze of menu and sub-menus. It’s hard to find the more obscure options.

But which of the settings you’ve overlooked are useful, and which can live on in peaceful obscurity? Let’s find out. (Depending on your device’s manufacturer, some of these settings might not be available.)

1. Screen Magnification

Do you ever come across a really small font or tiny picture while you’re browsing the web?

If you’re using a browser on a desktop machine, it’s easy to zoom in and take a closer look. And, of course, Windows and macOS both offer a robust set of accessibility tools.

On mobile, it’s a different story. Some web pages allow you to use the pinch-to-zoom gesture, whereas others aren’t compatible with the feature. It all depends on how the site is coded.

Android offers a solution. Open theSettings app and navigate to Accessibility > System > Magnification Gesture and slide the toggle into the On position.

When enabled, triple-tap the screen to zoom in, and navigate by dragging two fingers around the display. You can adjust the level of zoom by pinching. Triple-tap again to return to the standard view.

Alternatively, triple-tap the screen and keep your finger pressed down on the third tap. It will temporarily zoom the screen until you release your finger.

2. Invert Screen Colors

The accessibility menu offers a couple of other useful features that we’ll look at. Firstly, let’s check out how to invert your screen’s colors.

For someone with a visual impairment, this has obvious advantages. But it’s also useful for everyone else.

Just think, how many times have you wished an app had a “dark” theme? And how many times have you given yourself sore eyes because you’ve used a bright screen in a dark room? Sure, there are third-party apps that can alter your screen’s color temperature, but this is an easy-to-use native alternative.

To invert your Android’s screen, open theSettings app and go to Accessibility > Display > Color Inversion. Slide the toggle into the On position to get started.

Using the feature has a couple of caveats. Firstly, your device may not perform as efficiently. Secondly, there’s no shortcut -– you’ll have to go into the Settings menu every time you want to enable or disable the inversion.

3. Add More Printing Services

Occasionally, it’s useful to be able to print a document from your smartphone. Perhaps you forgot an important letter or need to produce a copy of your ID.

Google Cloud Print has been part of the Android operating system for a long time. However, despite being a long-term feature, the service doesn’t feel solid. Print jobs often fail, and if you’re using an old printer, adding it into the app is a painstaking process.

Luckily, you can easily add more printers to your devices. Plugins are available from all the leading printer manufacturers, including HP, Brother, Canon, Xerox, and Epson. There are also a few cross-printer third-party apps to choose from.

To add a printer plugin, go to Settings > Printing > Add Service. A list of all the available plugins will appear. To add one to your phone, tap on the icon and clickInstall.

4. Make Passwords Visible

If you follow proper security etiquette, your password should be long, use a mix of numbers and letters, include uppercase and lowercase characters, and use some special characters.

On paper, that sounds great. In practice, it’s annoying –- especially on a mobile device. It takes a long time to enter it when you’re using an on-screen keyboard. Worse yet, you don’t even know if you made an error; your phone typically obscures your password using stars or dots.

If you find that you have to constantly re-enter passwords due to typos, this setting could be for you. Enabling it will mean your password will be visible on-screen in plain text.

To make all your passwords visible, go toSettings > Security > Passwords > Make passwords visible and slide the toggle into the On position.

Warning: This setting has obvious security implications. If you enable it, make sure nobody is looking over your shoulder when using your online banking or other sensitive services.

5. Set Your Billing Cycle

Although the general global trend is towards an unlimited data allowance on your cell phone contract, there are many carriers –- especially in the United States — that restrict your allowance.

If you go over your allowance, you’ll either be forced to pay out for an expensive add-on to keep you online, or you’ll receive a shock when your bill arrives.

If you set your billing cycle, you can monitor how much data you’re using over the 30-day period and adjust your usage accordingly.

To set up your bill date, go to Settings > Data Usage > Billing cycle > Billing cycle. In this menu, you can also choose whether you receive warnings when you get close to your limit, and even disable mobile data entirely if you go over it.

To see how much data you have used in a given period, tap on Mobile data usage. You’ll be able to see a neat graph that shows you which days your usage was unusually light or heavy.

6. Touch and Hold Delay

For the final setting, we head back to the Accessibility menu. Did you know it was possible to change how much time you need to hold your finger down for during a “long press”?

If you frequently find yourself needing access to the copy and paste context menu, setting the time to the shortest available option is a huge timesaver.

To make your selection, open the Settingsapp and navigate to Accessibility > System > Touch and hold delay. You can choose from ShortMedium, or Long.

What Other Android Settings Are Useful?

In this article, we’ve introduced you to six underused and underappreciated Android settings on your device.

Read More

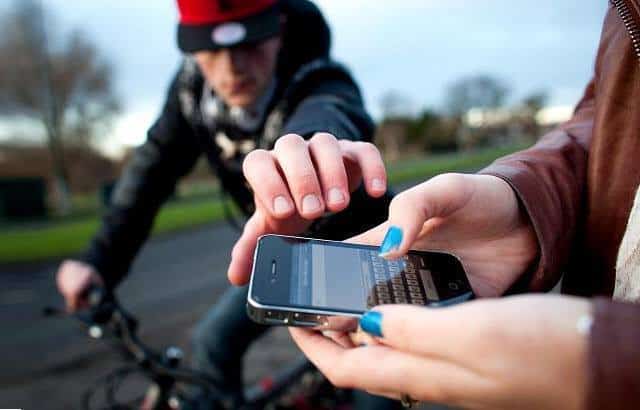
6 things to do immediately your phone is lost or stolen

June 28, 2018 0

Losing a smartphone either to theft,  mishandling, or any other mishap can be a really horrible experience. Normally, the next step to take after the occurrence of a smartphone loss is to try to recover the device, before replacement comes to mind — i.e when recovery fails.

The actions below are some of the best things we think you should do swiftly as soon as you discover your device has gone missing.

1. Track or Locate the Device

The first advised step is to determine where you device is. This will help tell if your phone was stolen or mislaid, or you forget it at an event you attended.

If you have tracking and monitoring apps previously installed on the device, you can easily track them. There are a good number Android tracking apps available on the Google Play Store and likewise, App Store, for tracking iOS devices.

Alternatively, you can use the services of phone manufacturers to locate your phone. “Find My iPhone” is a perfect phone tracking service for iPhone users while the “Find My Device” is for Android devices. These apps and services allows you remotely “call” your device to see if it around you (maybe lying somewhere in the kitchen drawer) and give map and satellite locations, too.

2. Password change

Either after successful tracking of your phone and you discover that it is in an unknown location, or all tracking efforts have proved abortive and your phone is still unreachable, the next best thing to do is the change the password of vital apps with sensitive information.

Passwords of apps like banking apps, email, cloud storage, electronic wallet, and social media apps. Some tracking apps and services even allow you remotely lock your device with a new security code to deny the anyone in possession of your phone access to the contents.

3. Contact your network carrier

If you still cannot reach your phone, or you are now sure that it is in someone else’s possession, the next point of action would be to contact your network carrier to block services on the phone (SIM card) and also commence service retrieval processes.

4. Contact your Bank

It is always recommended that you contact the financial institution(s) through which you make monetary transactions on the missing device. Inform them about the state of your phone and instruct them to temporarily restrict the number from carrying out any transactions till you retrieve your phone or number.

This action is particularly important in Nigeria as phone thieves can gain access to your Bank Verification Number (BVN) by dialing a USSD code on your device. And once this occurs, all the monies in your bank account can be withdrawn.

5. Contact relatives and work buddies

It is also highly recommended that you notify relative and the people at your workplace about your missing device, particularly if you use the phone to access work-related data and information. Inform your colleagues and employer will be an awesome idea.

According to TomsGuide,

“This allows the company to take preventive steps to secure its data. The company’s IT department may also be able to delete company data from your phone remotely.”


6. Wipe/ Erase contents of the phone

Depending on the contents of the missing phone, this is actually the last thing that is advised to do — i.e if the likelihood of ever getting the phone back is zero (or very close to zero).

The good thing about this is that it can also be done remotely — via phone tracking/monitoring apps and services, or authorities with relevant equipment to remotely wipe data off a missing/stolen phone.

However, you should know that after wiping data off a phone, the chances of recovering the device later in the future are slim.

The above 6 items are some of the precautionary actions you should take once you notice your smartphone is missing. Doing these will ensure 2 things:

1. That you recover your phone.2. That is the case where phone recovery fails, you do not lose other things (like money, data, etc.) in the long run.

Read More

How to Increase Your Android Phone Battery Life

June 28, 2018 0

Now most peoples are using android phones. Because those phones have many cool user friendly features. But do you know about that? You can't keep your android phone battery long lifetime because this features are wasting it. So I thought tell you how to use your android phone battery as long time with few small tricks.But you really don't need your phone ALL the time.

Turn it Off. Obviously this is not an option but you can keep your battery life with this tricks. If you didn't use your phone some long period then turn then turning your phone off is the easiest way to save battery life.

Turn Off Vibrate And Keys Tones. This function is wasting your battery life much more. So if you didn't want vibrate and key tones turn off them. You can also set your ring tones to a low volume to save extra power.

Decrease Screen Brightness. You can save your power via decrease screen brightness. If you can set your screen brightness 50% or lower. If not set it automatically, but never set it 100%.

Don't Use Live Wallpapers. Live wallpapers is one of the cool feature on android phones. But they use your battery charge much more.

Turn off Bluetooth and WiFi. Bluetooth and WiFi is mostly using features on mobile phones. Also they reduce your battery lifetime. So disable them when they’re not in use.

Close Unwanted Applications. Apps using battery power as long as there open. So close unused applications on your programme list.

Charge Your Battery Before It Dies. You must charge your phone before it fully discharges of its power. If not your battery lifetime reduces very quickly. This trick is very important.

Use Hands free. If you watching movies or listening music use Hands free. Don't use phone speakers to do it.

Turn Off Flash Lights. Avoid using the flash on camera phones. The little flashes are powerful and therefore use lots of energy. So don't use flash lights every times.

Limit the screen timeout. Most cell phone screens will stay lit for a specified period of time after receiving input such as a swipe or tap. Set the timeout to the shortest available in your settings so the display will essentially go into a sleep mode when not in use.

Read More

Post Top Ad